- Each location you create in the CyberStockroom map has a barcode number that is automatically generated, but you can replace these numbers with your own. To learn how to do this, please take a look at the Editing Locations article.
- Product numbers can also be generated automatically, but you can use your own if you prefer. Take a look at the Creating New Products article to learn more.
The 'Quick Scan' Feature
This feature is designed to handle a large number of back to back transactions quickly, without refreshing or slowing down. If you want to see 'Quick Scan' in action, please watch the short video below.
Step-By-Step Guide to Quick Scanning

1. Launch the 'Quick Scan' feature by clicking the barcode icon in your top menu.
This feature allows you to do 3 things:
-
Check products in to a location
-
Check products out of a location
-
Transfer products between locations
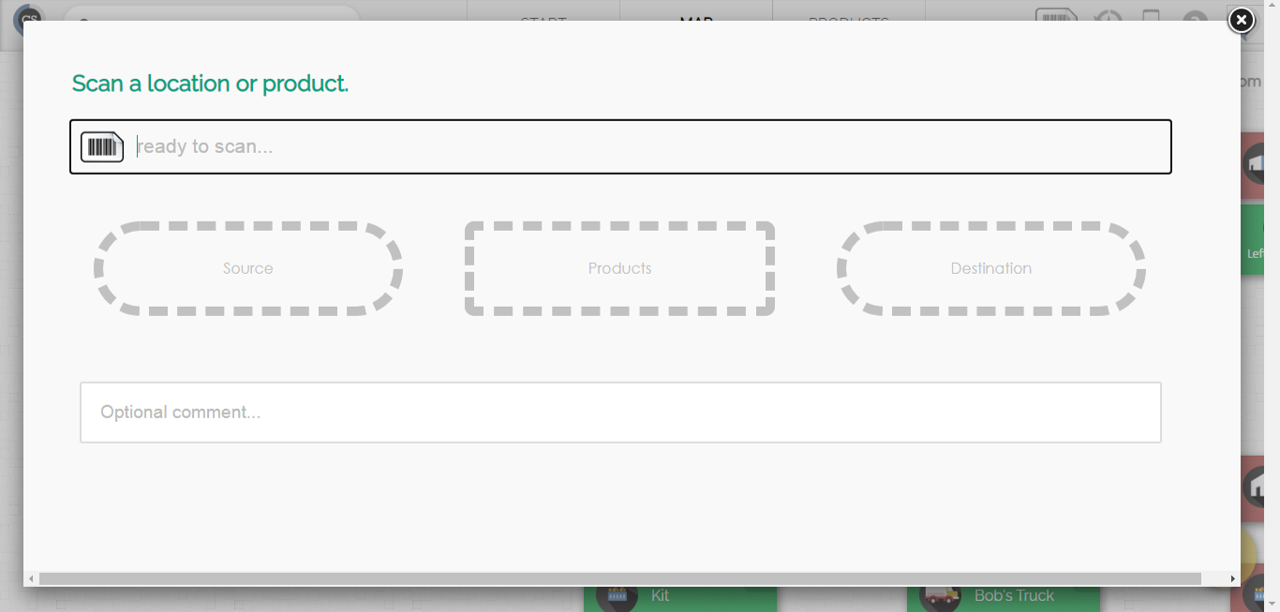
2. Scan the barcode number of a location where you want to check products in or out.
-
If you want to check products out, scan the location once.
-
If you want to check product in, scan the location twice.
Note: Red means check out; Green means check in.
3. Scan the barcode number of the product you want to check in or out.
-
Scanning the barcode number of one product multiple times will increase its quantity for that transaction. You can also adjust the quantity manually.
4. Click either the 'check in' or 'check out' button when you're done. You'll see a green check mark if the transaction was successful.
Transferring Products between Locations
1. In the 'Quick Scan' feature, scan the barcodes of the 2 locations where products will be transferred to and from.
2. Scan the barcodes of the product/s you want to transfer.
-
You can scan the locations/products in any order. But by default the first location you scanned is where the products will be taken from and the 2nd location you scanned will be the destination of those products.
-
To alternate between where the products are taken and transferred to, just scan any of the 2 locations again. You can also do this manually.
3. Click the 'transfer' button when you're done.
Quick Tip!
You can use the Quick Scan feature in every field in CyberStockroom.
For better control over data entry, predefined barcodes (for example, scanning a sheet with the list of value codes) represent specific values instead of typing them. This way, users can scan the relevant barcode rather than typing, which helps maintain data integrity and minimizes manual input errors.
Sample file here: Predefined barcodes
