Setting an Expiration Date for Your Products.
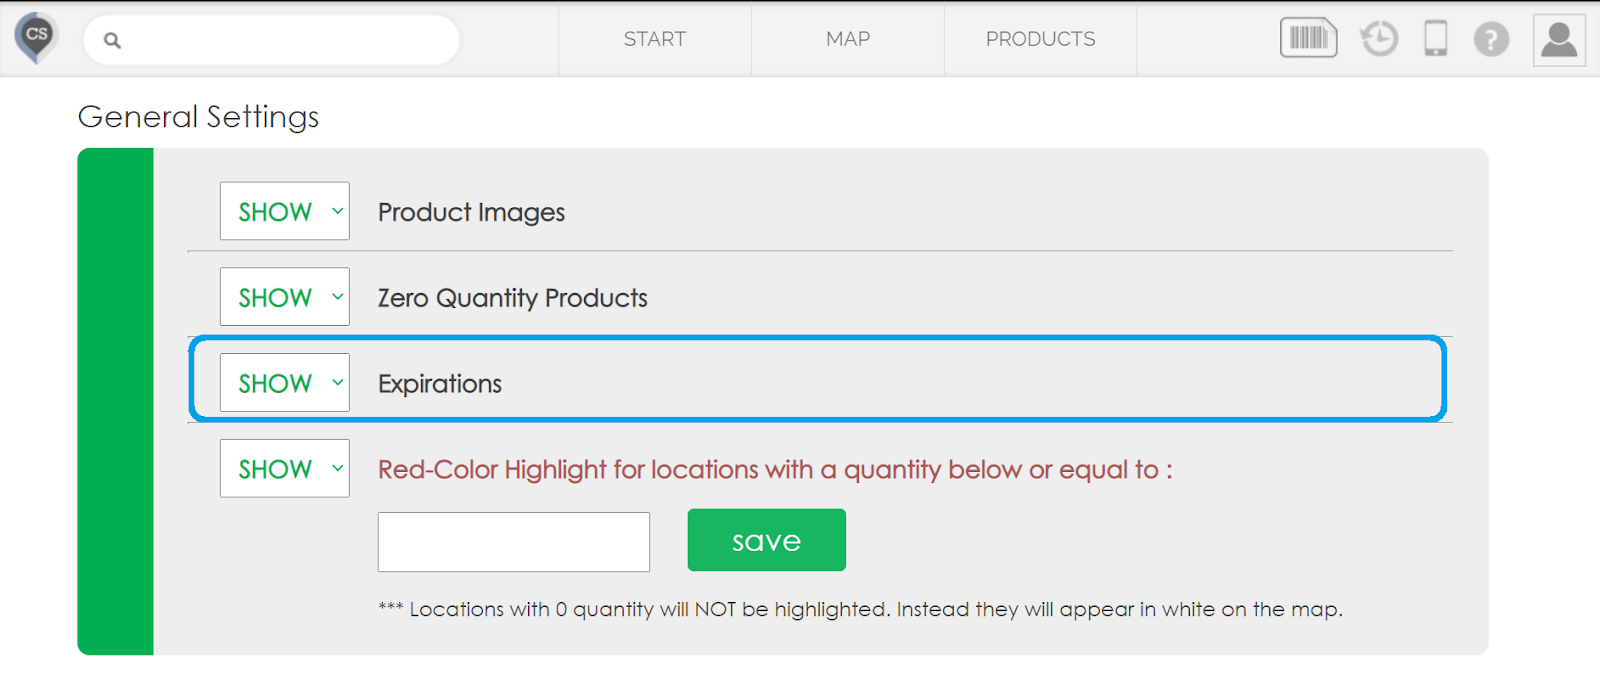
1. In the Settings page, scroll down to the general settings and choose ‘SHOW’ expirations.
Note: If you select ‘HIDE’ the expiration dates will not be deleted, it will just be hidden and you can change back the setting any time you want.
2. Click on any product.
- The following window will appear.
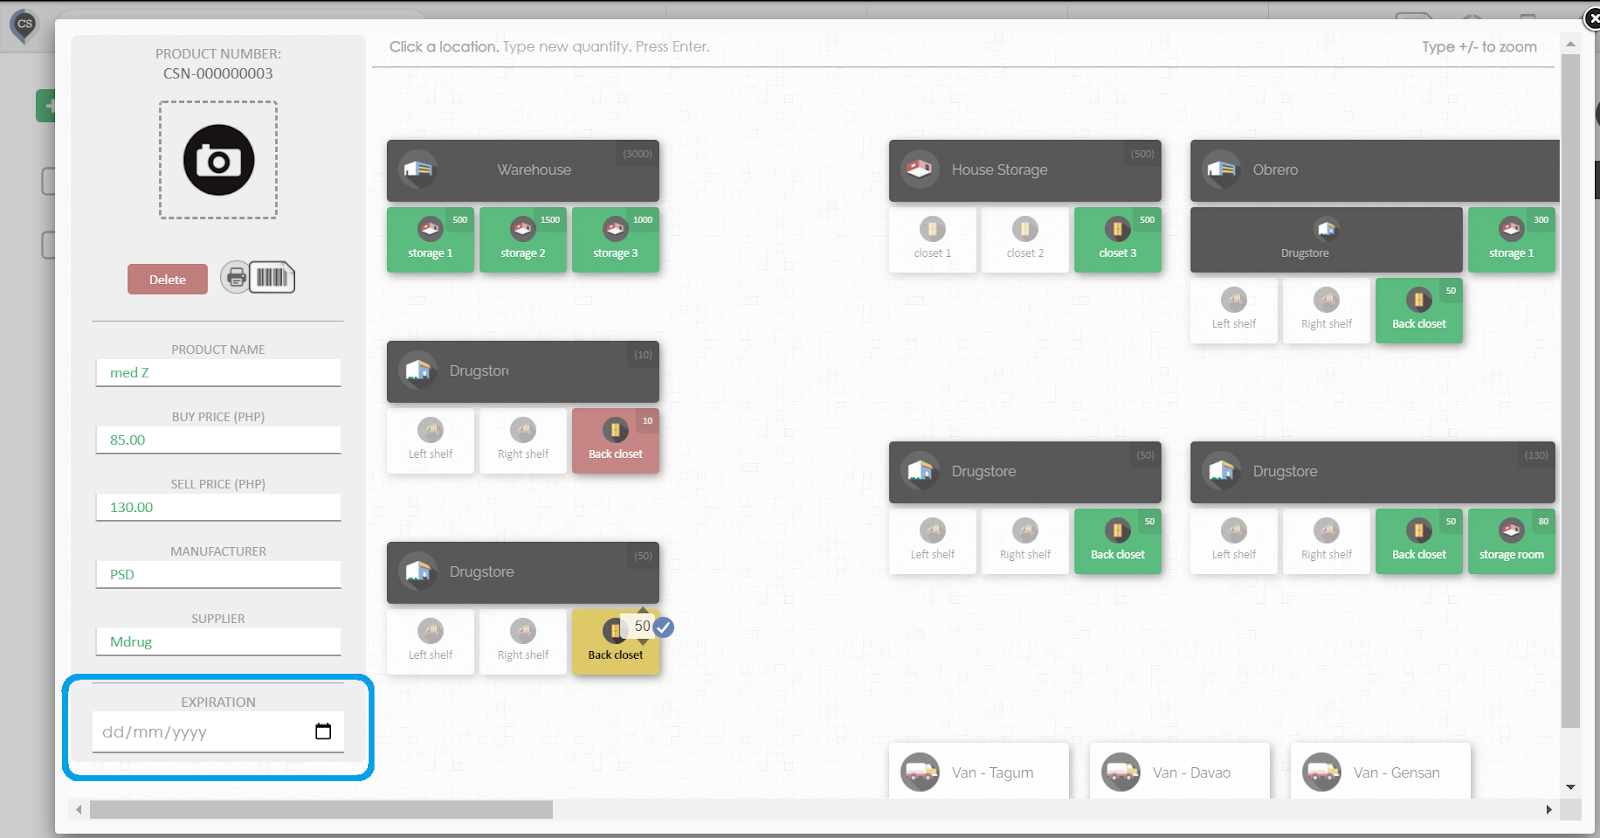
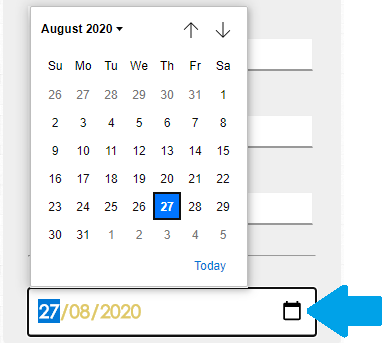
3. On the bottom left corner of the window, you can see a field labeled ‘EXPIRATION’. Click the small square icon on the expiration field and a mini calendar will pop up. Select a date on that calendar and it will be the expiration date of that product.
Note: You can only have one expiration date for a product. So if you will set an expiration for product X, all product X items across the entire map will have the same expiration date.
How to See All Products with an Expiration Date.
1. Hover your mouse over ‘PRODUCTS’ in the top menu, a dropdown menu should appear.

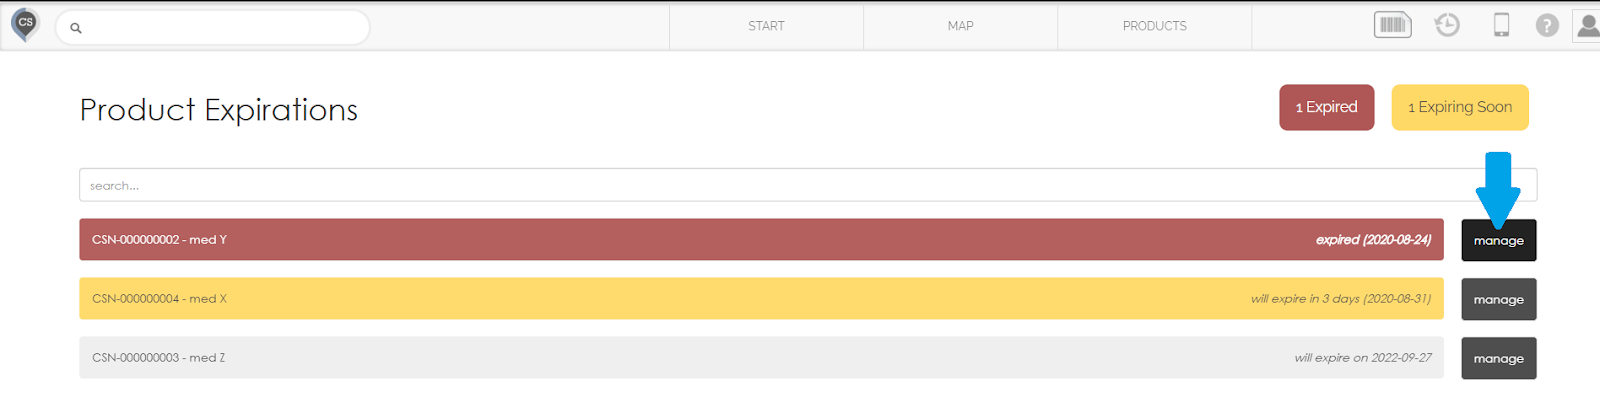
2. Click the ‘Expirations’ tab.
- You will be brought to another window where you can see all items with an expiration date.

- In this image you can see 3 products with expiration dates and each one has a different color.
RED - This means that the item has already passed its expiration date.
YELLOW - This means that the item will expire within 60 days.
WHITE - The item has more than 60 days before it will expire.
- At the top right corner of the screen there is also a count of the products that have expired and will expire soon.
How to Replace Expired Items.
1. In the expirations tab, click the ‘manage’ button beside an item.
2. After clicking the manage button, a new window will pop up where you can choose a new expiration date and a new product number.
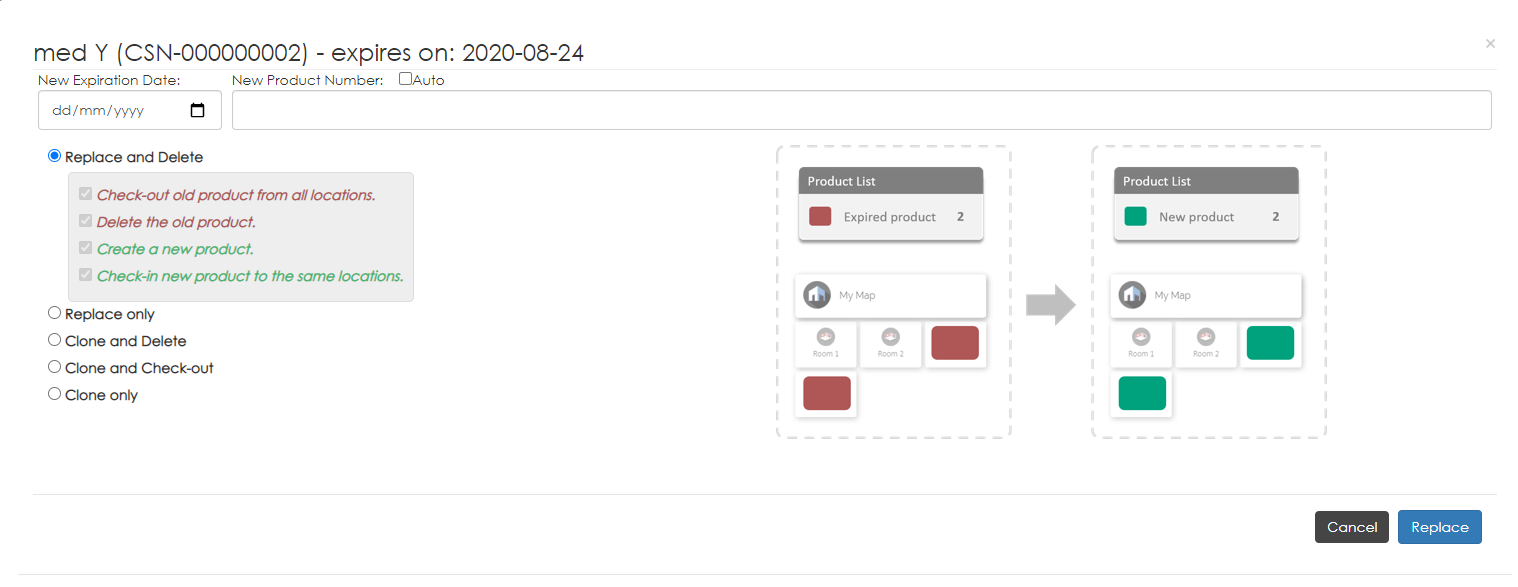
- You can let CyberStockroom set a new product number for you by clicking the checkbox marked ‘Auto’.
Watch the video below to learn about the 5 ways to replace expiring products: