Everything else you need to know about the activity history page can be found in the 'Viewing and Searching Your Activity History' article.
Steps to Download the Activity History Report
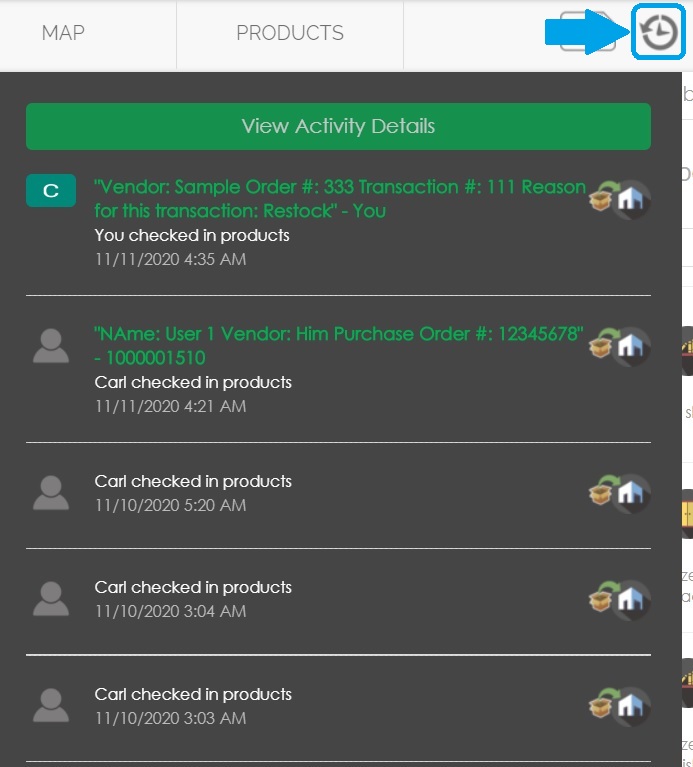
1. Go to the activity history page.
-
Navigate to the Activity History page
-
If you wish to narrow down your report, apply any necessary filters as explained in the Viewing and Searching Your Activity History article.
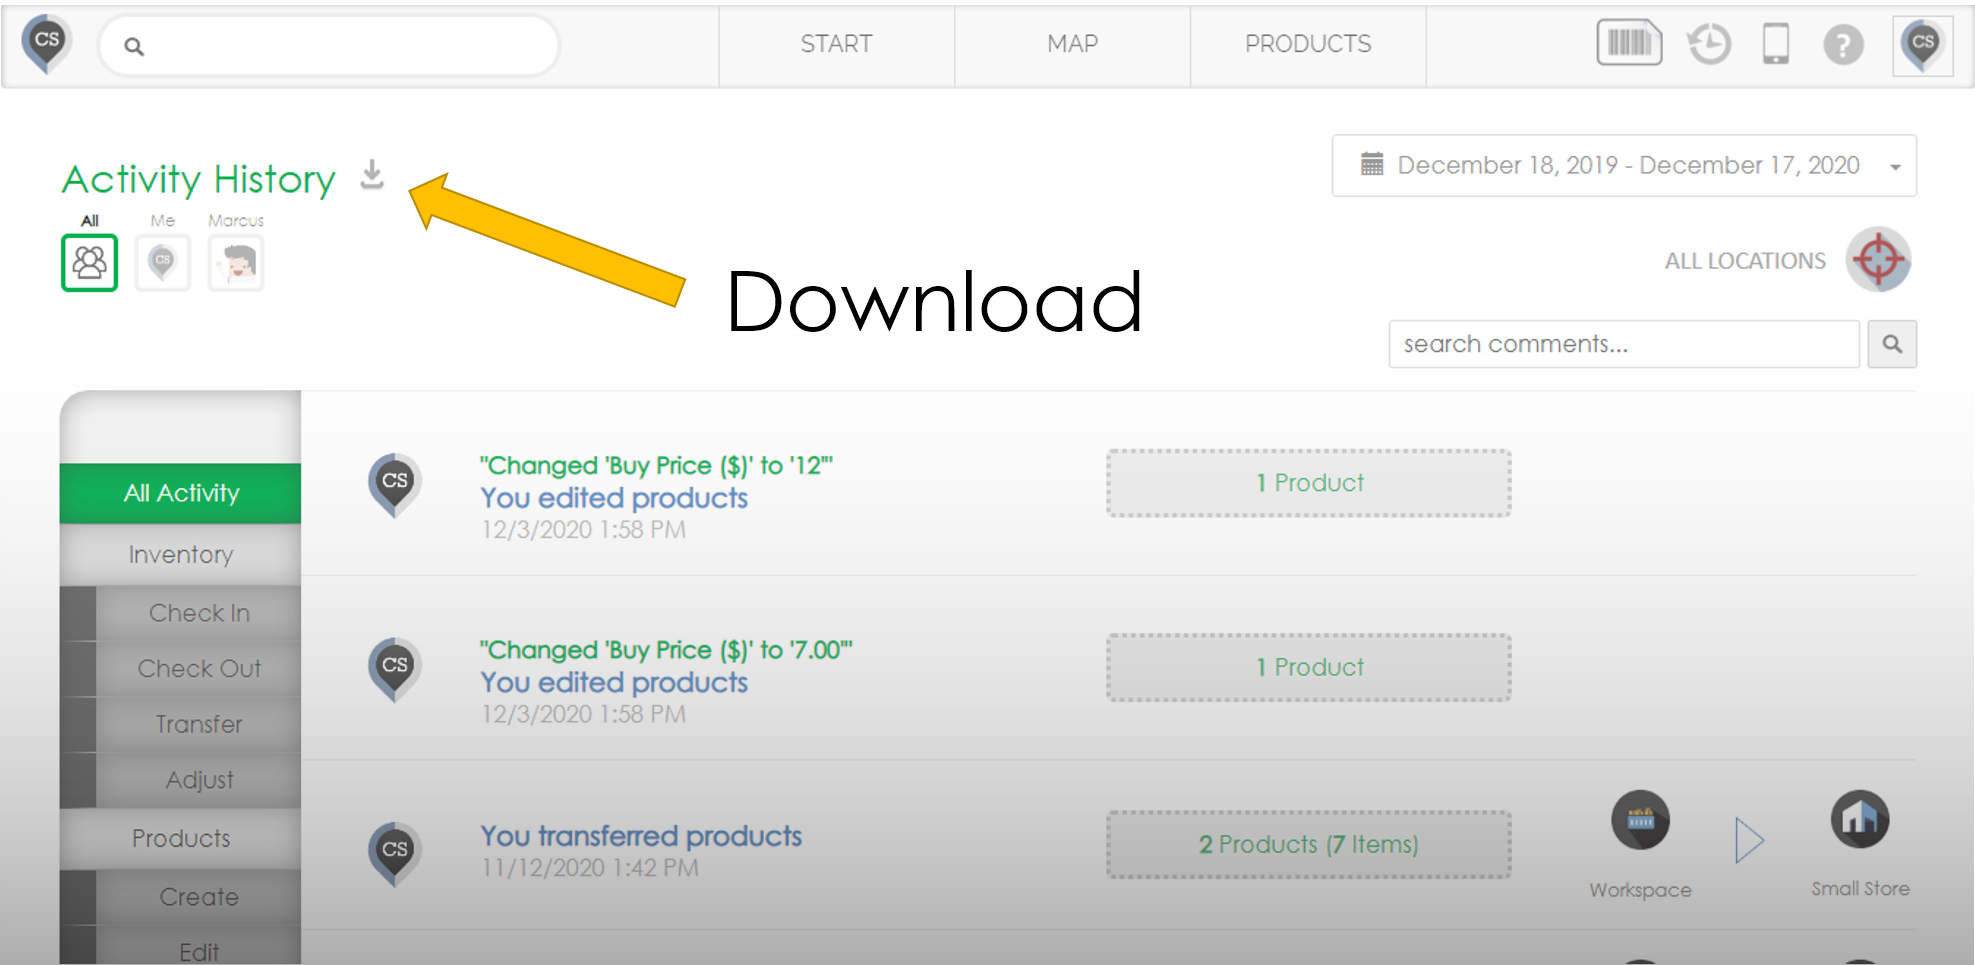
2. Click the Download button.
-
Locate the Download button in the top left corner of the page, next to the Activity History text.
-
The button looks like a downward arrow icon.
3. The file will be downloaded to your Downloads folder.
-
Once you click the download button, the file will automatically start downloading.
-
You can find the downloaded file in your computer’s Downloads folder.
____________________________________________________________________________________________________________________________________
What is in the Downloaded Activity Report?
The downloaded report is a spreadsheet file that includes all visible information from your Activity History page, based on the filters you applied. Here’s what you can expect to see:
-
Date Range – The date range of the downloaded report is displayed in the top left corner of the spreadsheet.
-
Date – The date when the activity was performed.
-
User – The user who performed the activity.
-
Activity – The type of activity performed (e.g., transfer, check-in, check-out).
-
Source – The source location where the activity was initiated.
-
Destination – The location where products were transferred or checked in.
-
Comments – Any transaction comments entered during the activity.
-
Product Number – The product number of the item involved.
-
Description – The name or description of the product.
-
Quantity – The quantity of the product used or transferred.

____________________________________________________________________________________________________________________________________
Controlling What Data Appears in Your Report
If you want to narrow down the information that appears in your Activity Report, you can apply filters before downloading the report. This will allow you to customize the report based on:
-
Date Range
-
Activity Type
-
User
-
Source or Destination Location
-
Product
For detailed instructions on how to use filters, please visit the Viewing and Searching Your Activity History article.
____________________________________________________________________________________________________________________________________
Understanding the 'Readable Format' Option
When downloading your Activity History report, you have the option to check or uncheck the Readable Format box located at the top of the Activity History page.

By default, the Readable Format option is checked, which means your report will be downloaded in a simplified and easy-to-read format where related transactions are grouped together. However, you can choose to uncheck this option based on your needs.
✅ When the 'Readable Format' is checked (default):
-
The report will group similar transactions (such as transfers or product check-ins), making it visually cleaner and easier to read.
-
However, this format introduces blank spaces and combined rows, making it harder to sort or manipulate data.
❌ When the 'Readable Format' is unchecked:
-
The report will no longer group similar transactions. Instead, each transaction will be displayed as an individual row with all relevant data included.
-
This format eliminates blank spaces, allowing you to sort the report easily by any column like Location, User, Product Number, Quantity, etc.
-
It’s particularly useful if you plan to manipulate the report data (such as creating pivot tables, filtering data, or analyzing trends).
👉 Recommendation: If you need a clear, summarized view, keep the Readable Format checked. If you need more control over sorting and manipulating your data, uncheck the Readable Format option.