What are custom fields?
Custom fields are the properties of the products in your inventory. You can use them to add detail to your items so that you can organize them and be able to quickly identify them. A few of the product fields are fixed and cannot be changed.
FIXED FIELDS: Product Number, Description, Buy Price, Sell Price
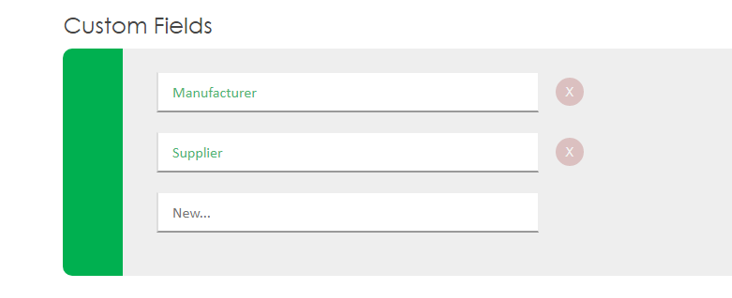
In addition to these fixed fields you can add any number of custom fields. When you create a CyberStockroom account a few popular custom fields (Manufacturer and Supplier) are automatically generated but you can change these and add your own.
How Can I Add/Change Custom Fields?
1. Go to the Settings page on CyberStockroom.
2. Scroll down to the Custom Fields part of the page.
3. To add a new field, type on the text box with the word 'New...' inside it and press enter.
4. To change an existing field, click on the textbox of the field and type on it.
5. To delete a field, click on the red 'X' button beside that field.
Viewing Custom Fields
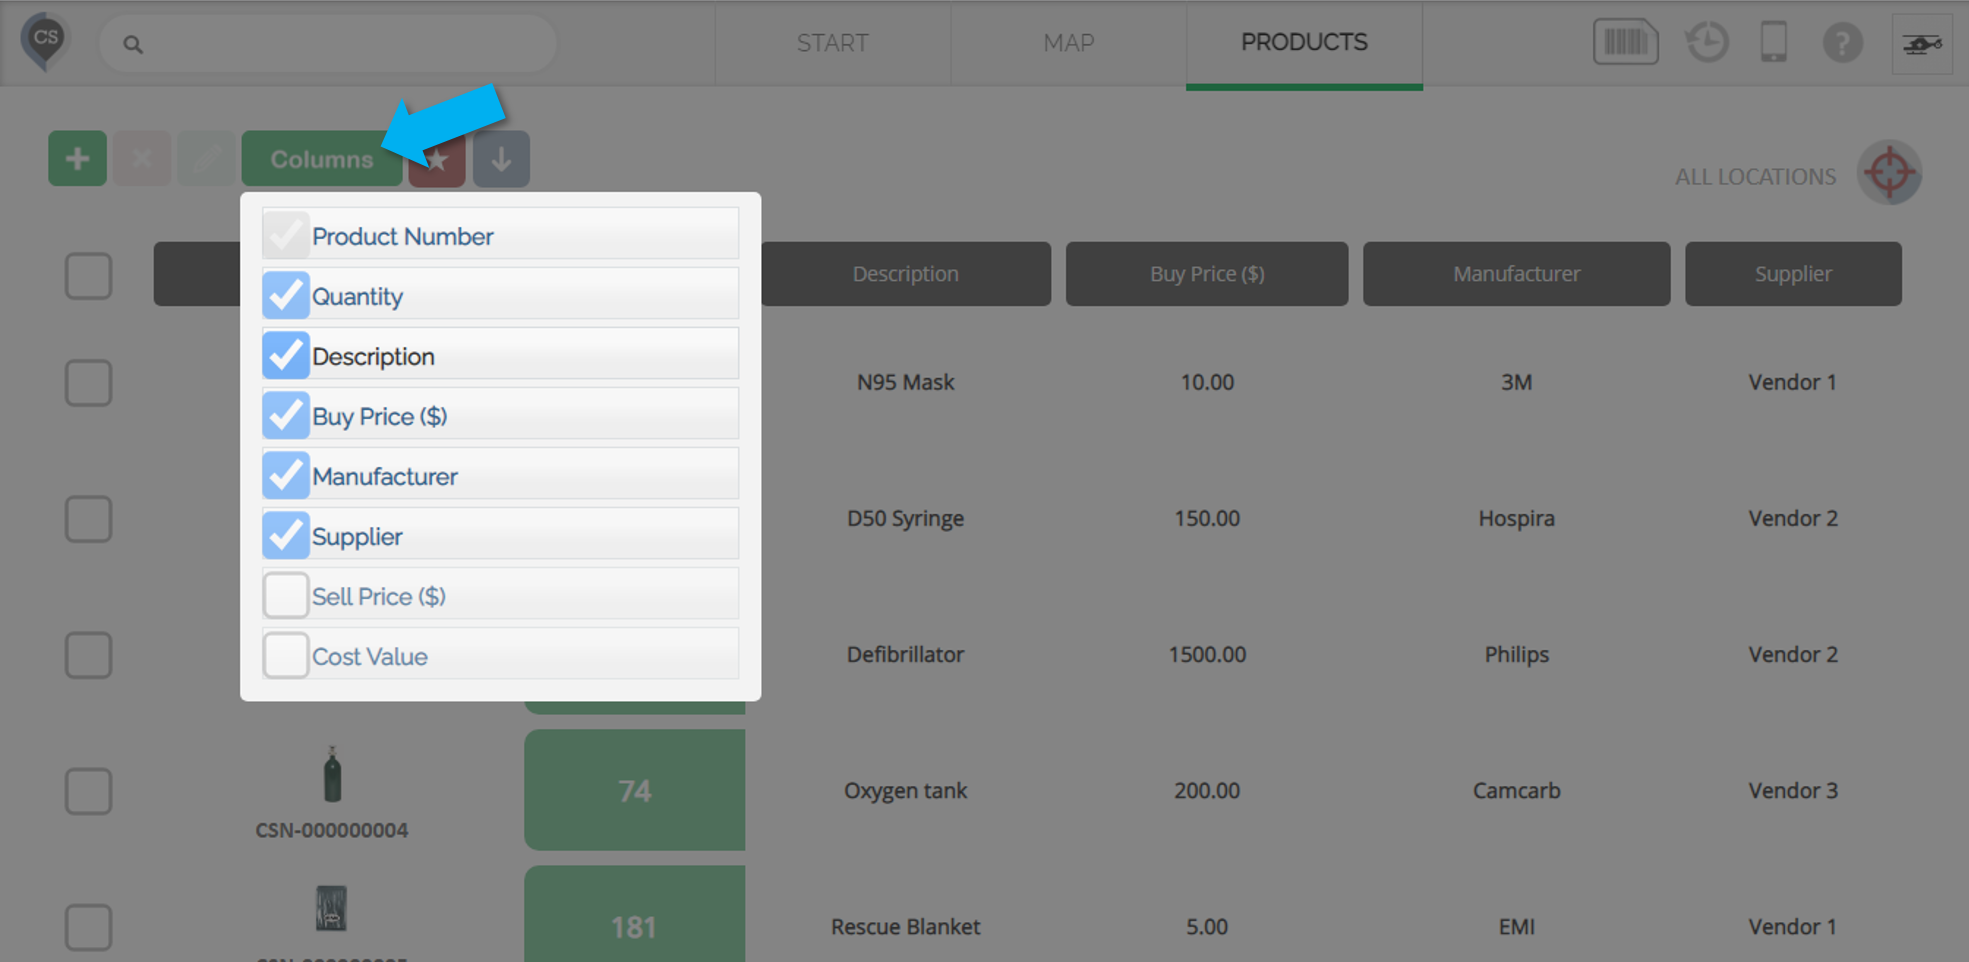
You can organize the way you see your custom fields in your Products page by hovering over the 'Columns' button
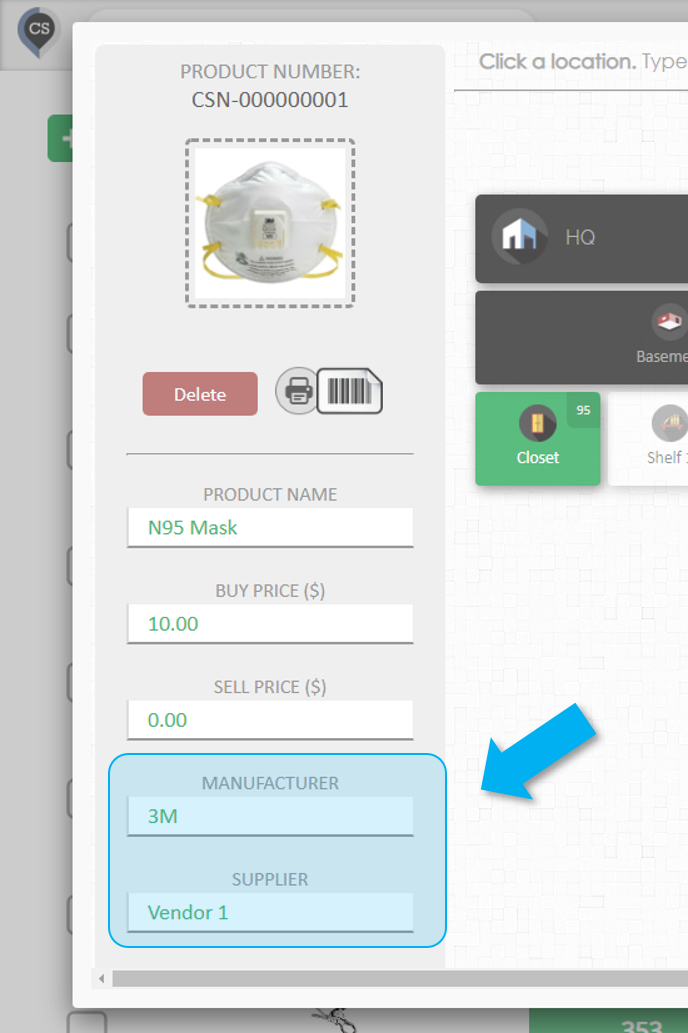
You can also view your custom fields whenever you select a product.
Which Custom Field to Add?
- You should add any field that can help you identify your products more easily. This can greatly help in making your inventory management faster and more painless.
- Sometimes it's useful to add fields for people/vendors etc.
- If you are using different units of measurement for your products (ex: dozen, box, each, lbs), then you might want to add a field called 'Unit'.
_______________________________________________________________________________________________________________________________________________________________________________________
Presets for Custom Fields
Using Presets for Custom Fields ensures consistency and prevents input errors, especially when a category has multiple possible values. By defining fixed preset values, you create a dropdown menu that your team can use instead of manually entering text, reducing mistakes and improving efficiency.
Steps to Create Presets:
-
Go to Settings
- Hover over the Profile icon at the top right corner of the screen.
- Click Settings from the dropdown menu.
-
Navigate to Custom Fields
- Scroll down to the Custom Field section.
- Click Set Defaults to open the settings for custom field values.
-
Add Fixed Values
- In the text field beside the Add button, type the value you want to include.
- Click Add to save each value. It will then appear in the larger box below.
-
Enable or Disable Manual Entry (Optional)
- Check the Allow other values box if you want your team to have the option to enter a custom value manually.
- If unchecked, users will only be able to select from the predefined options.
-
Save Your Changes
- Click Save to apply your fixed values.
Using Presets in the Products Page
Once you've set up fixed values, they will appear as dropdown options when adding or editing products:
- Navigate to the Products Page.
- Locate the product and the Custom Field.
- Instead of manually entering a value, a dropdown menu will now be available with your predefined options.