Accessing the Check-In/Out Page
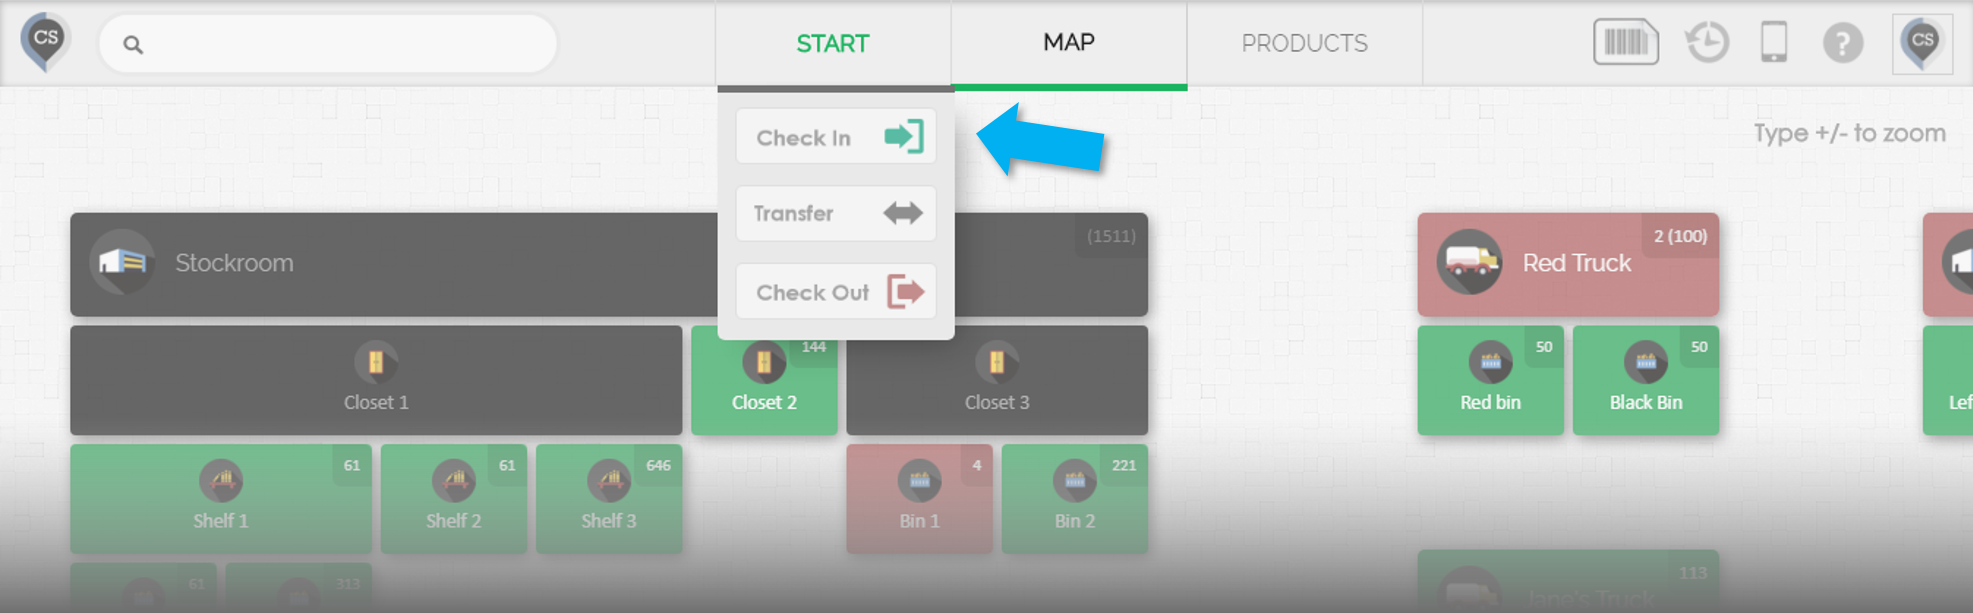
1. From the ‘Start’ Menu.
- Hover over the Start button, and a drop-down menu will appear. Click on either the Check-In or Check-Out button.
- You can also navigate to the Start page and click on the Check-In or Check-Out buttons from there.
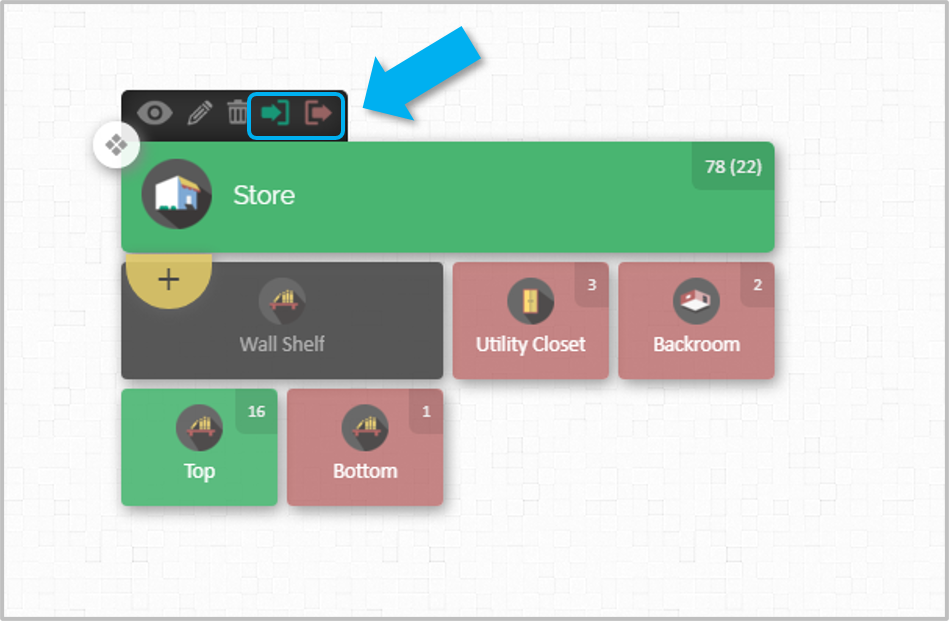
2. From the Map page.
- Hover over any location on the map.
- Click on the green (Check-In) or red (Check-Out) button from the menu that appears.
Selecting a Location for Check-In/Out
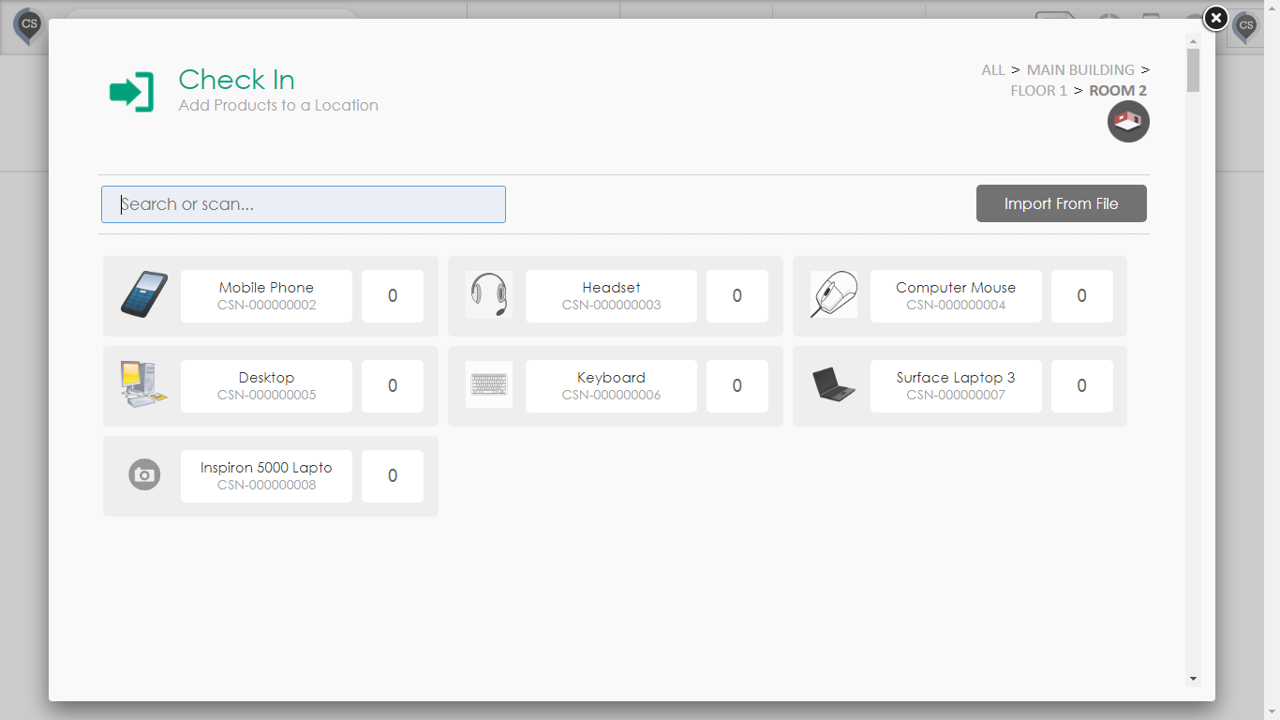
1. From the Check-In/Out Page:
- Once on the Check-In/Out page, select a location using the location selector in the top-right corner.
2. From the Map Page:
- Locate the desired location on the map.
- Hover over it and click the green (Check-In) or red (Check-Out) button from the menu.
Selecting Products from the List
A. Manually
- After selecting a location on the Check-In/Out page, you’ll see a list of all available products. Items already stored in that location will be highlighted in blue, showing their available quantities.
- If there are multiple products in that location and you can't find the product you're looking for, you can use the search field to locate it.
Click on a product to select it and enter the quantity.
- Note: Clicking a product multiple times won’t increase its quantity; it only selects or deselects the item.
Check-in products video guide:
Check-out products video guide:
B. With A Barcode Scanner
- On the Check-In/Out page, scan the barcode of any item in your catalog. The item will automatically be selected.
- Each scan increases the quantity by 1.
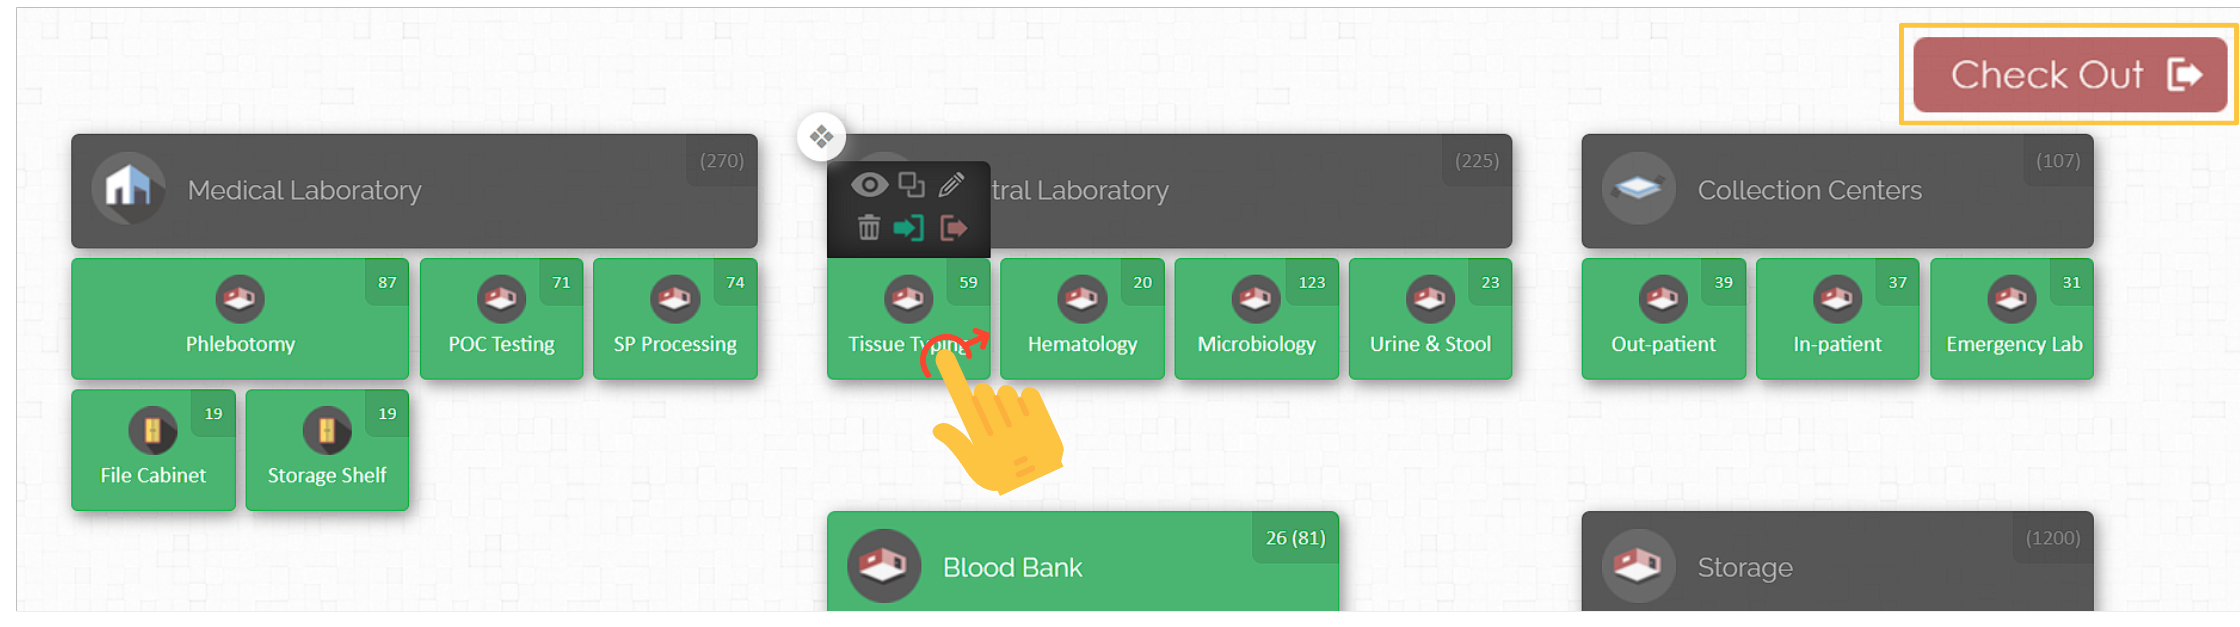
Using Drag & Drop feature to Check Out Items
The Drag & Drop feature makes moving inventory more intuitive and efficient. You can now use this functionality for Check-Outs as well.
How to Use Drag & Drop for Check-Outs:
1. On your inventory map, click and hold the location where the items are stored.
2. Drag the location to the Check-Out icon, which appears in the top-right corner.
3. A window will pop up displaying:
- The source location (on the left showing all available items).
- The Check-Out panel (on the right where selected items will be placed).
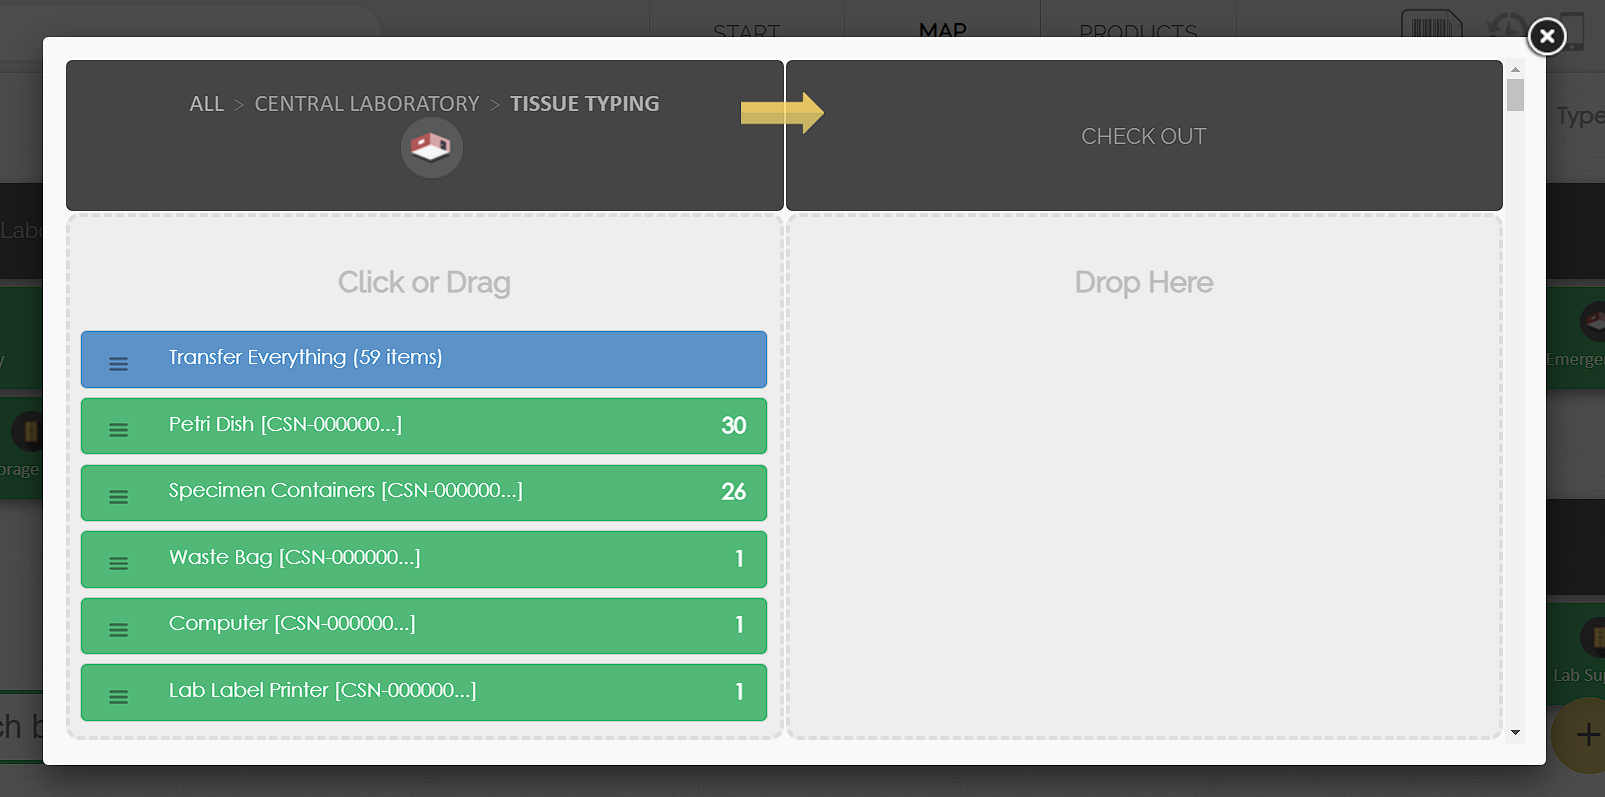
4. To check out products:
- Click a product to check out one unit at a time (each click increases quantity).
- Drag a product to transfer all available quantity at once.
- Click on a quantity to manually enter the amount to transfer.
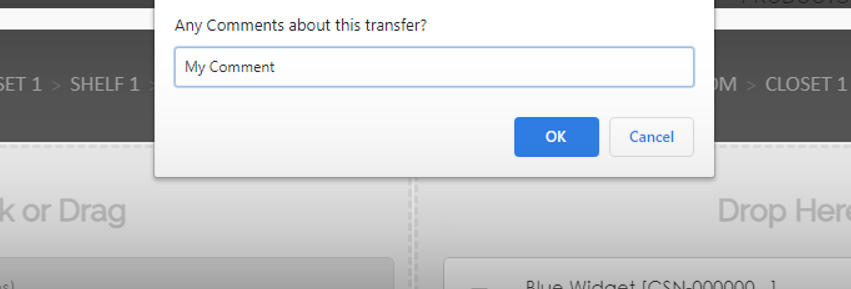
5. Finalizing the Check-Out:
- After selecting the items, click Save.
- You'll be prompted to leave a comment (optional but recommended).
📌Relevant articles:
Checking Items In/Out Using a Spreadsheet
For bulk operations, you can use a spreadsheet. This is especially useful when checking in/out multiple items or transferring products between different locations.
📌 See the article: "How to Transfer or Check In/Out Using a File" for detailed steps.
Leaving Comments After Transactions
After every Check-In, Check-Out, or Transfer, you can leave a comment to track details about the transaction.
📌 See the article: "Transaction Comments" for more information.
Setting A Default Location For Check in / out
If you usually check items in/out to the same locations, you can save yourself some time by selecting default locations. This way you will not need to select the locations each time you need to perform a transaction. Note that you can override these default locations during the transaction at any time.
📌 See the article: "Setting a Default Location for Check-In/Out" for more information.